It’s easy to use Watson NLP Library for Embed to include AI into your applications. Watson NLP provides both pre-trained models, or your can use the python wrappers to train your own models with Watson Studio, using a choice of algorithms. In addition, KServe Modelmesh is a standard model inference platform on k8s. It is built for highly scalable use cases and supports both Watson NLP and existing third party model servers with standard ML/DL model formats.
In many cases, the training data for a model might change over time, requiring model retraining. In this blog, I present a simple approach which combines automation in Watson Studio to build a new model, with KServe Modelmesh to seamlessly update the deployed NLP API.
For initial context, read my blogs Introducing IBM Watson for Embed and Deploying IBM Watson NLP to Kubernetes using KServe Modelmesh.
Automation
In this simple approach we will:
- Configure a Watson Studio Job to run the Notebook on a schedule
- Use a COS client such as
minioto upload modified training data - Configure KServe modelmesh to directly reference the resulting model in COS, meaning the Watson NLP runtime automatically uses the latest model
Using Watson Studio to train a classification model
Watson Studio is part of IBM Cloud Pak for Data, available as a service on IBM Cloud or it can be deployed to OpenShift running anywhere. The Watson Studio tool is used to run Jupyter notebooks which include the Watson NLP python libraries. These libraries provide a convenient wrapper to simplify the training and test of NLP models, using a variety of algorithms from both Open Source and IBM.
I have provided a sample notebook and training data. The dataset is intentionally small so the training can be completed relatively quickly, even with a small runtime resource in Watson Studio.
1
2
git clone https://github.com/deleeuwblue/watson-embed-demos.git
cd nlp/classification
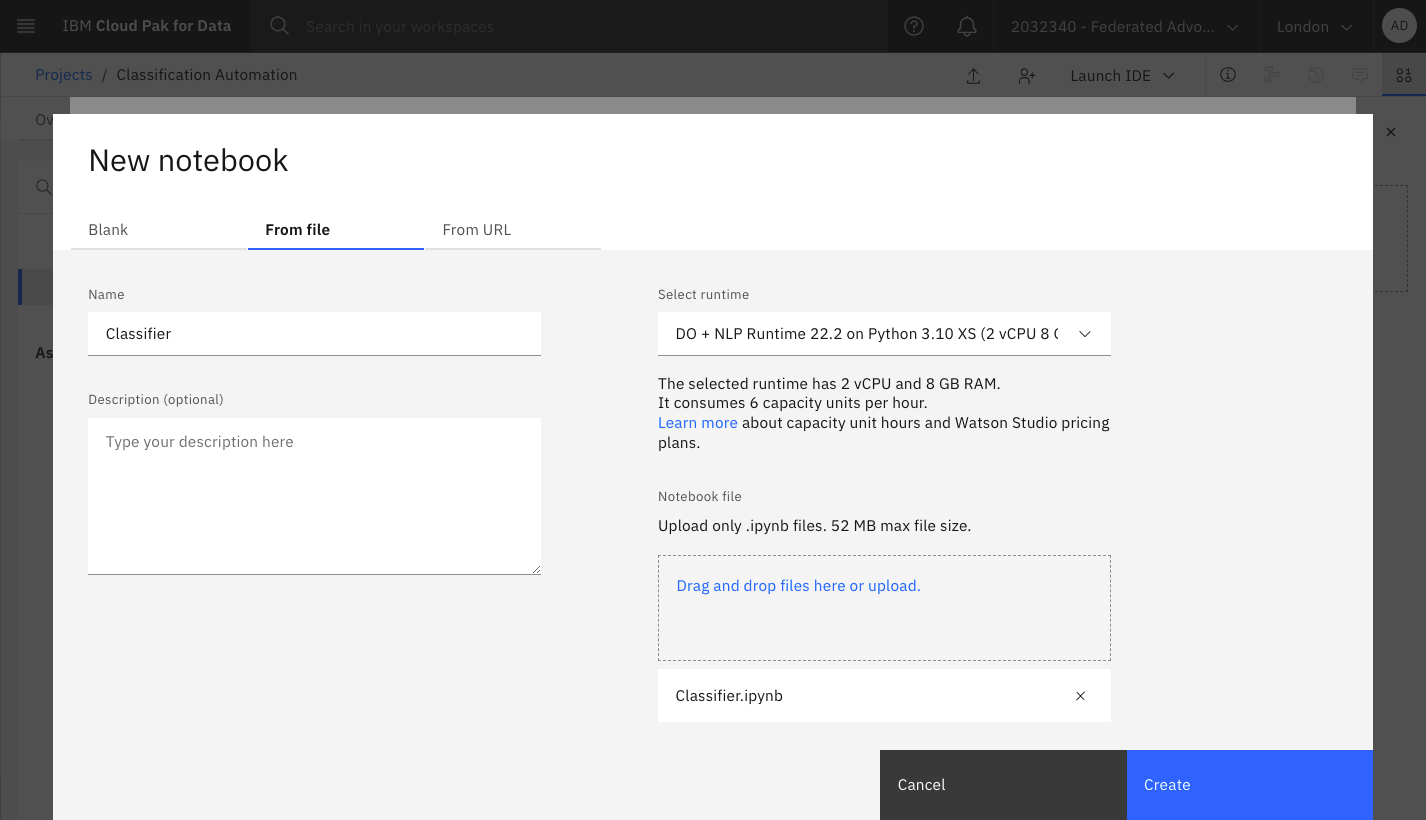
Create a project in Watson Studio, this includes:
- Assign cloud object storage
- Assign a runtime which includes Watson NLP, e.g. DO + NLP Runtime 22.2 on Python 3.10 (or create your own runtime using more resources)
- Upload the notebook
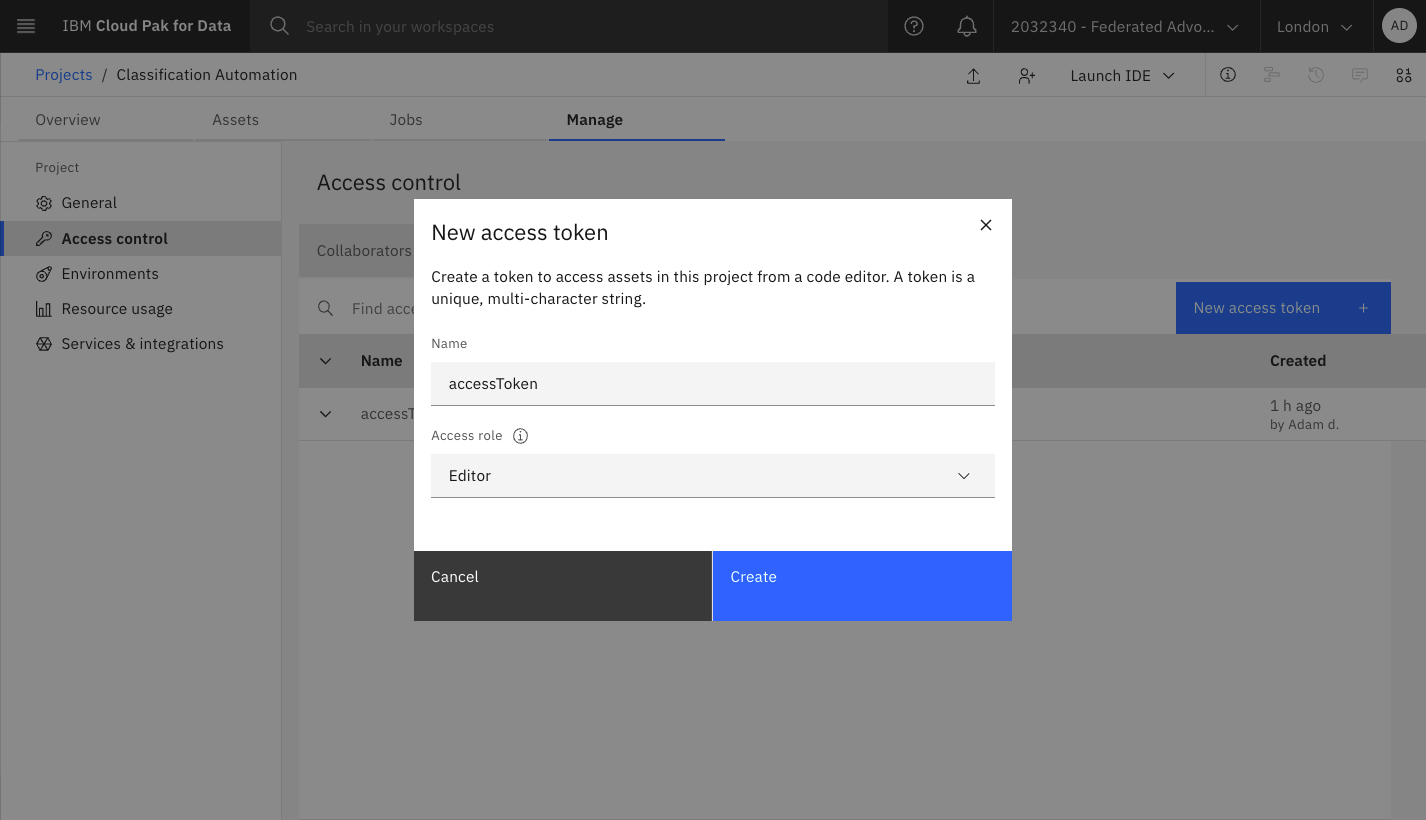
notebook/Classifier.ipynb - Create an Access Token with Editor access
- Add the
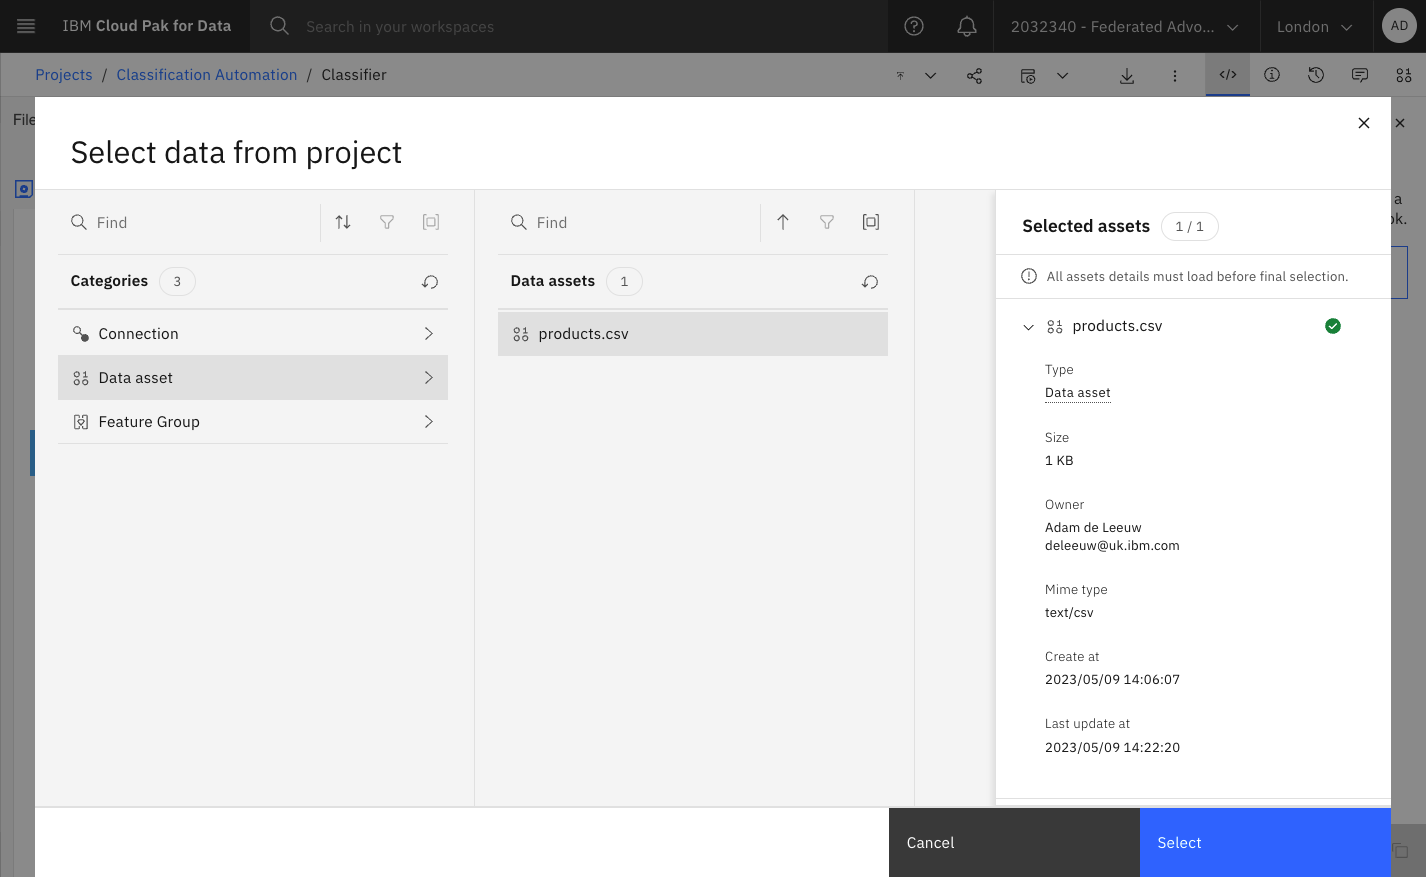
data/products.csvtraining data to the project
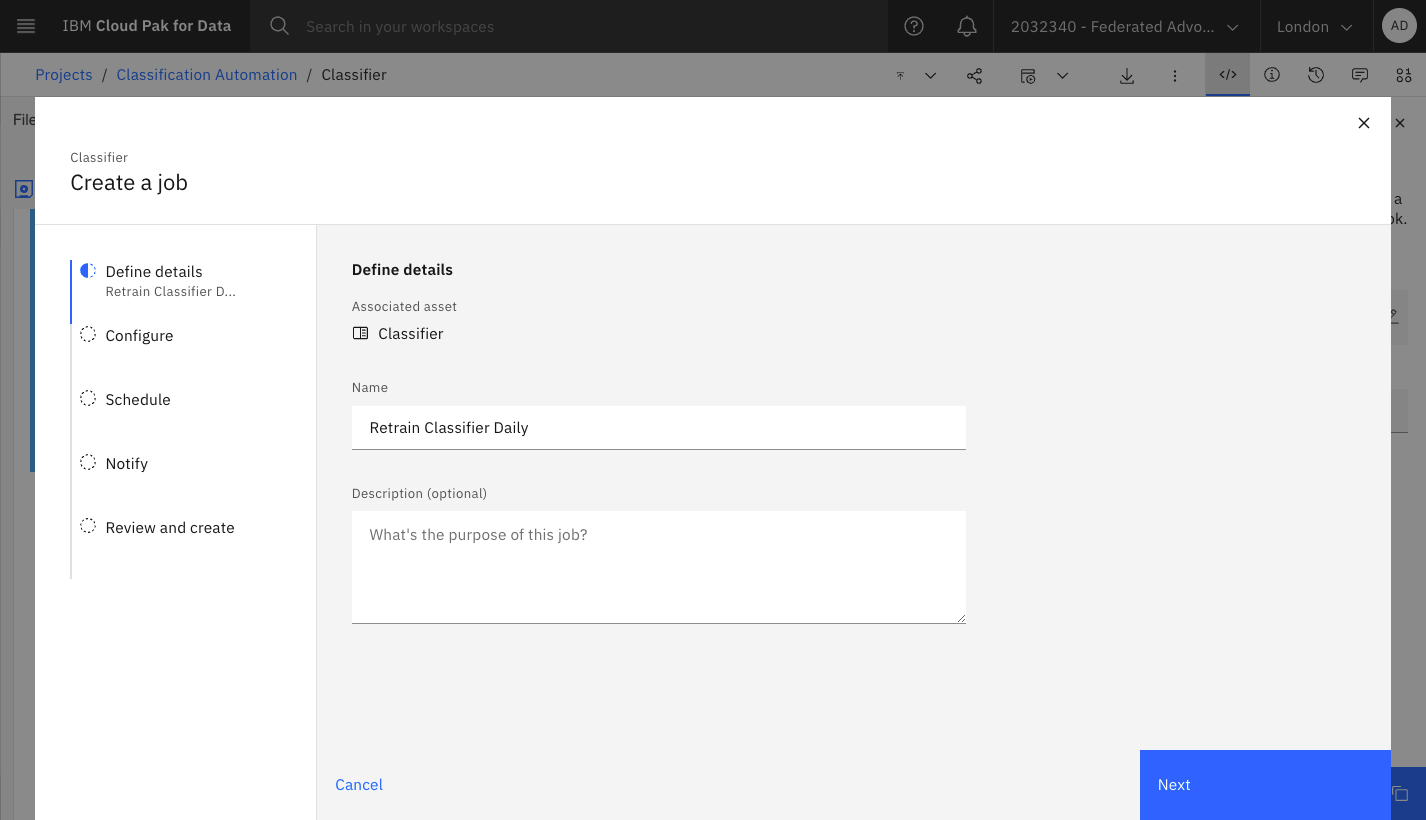
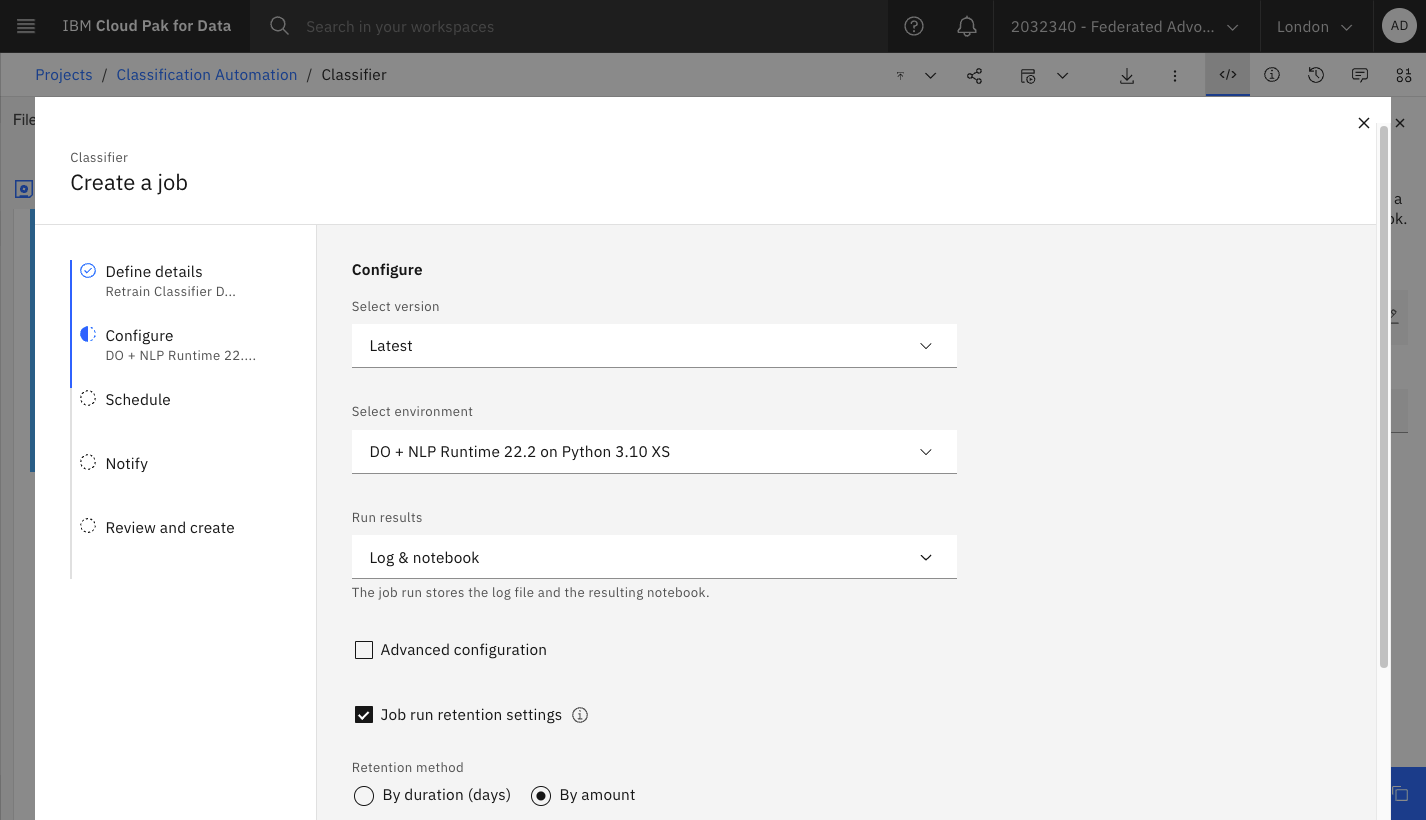
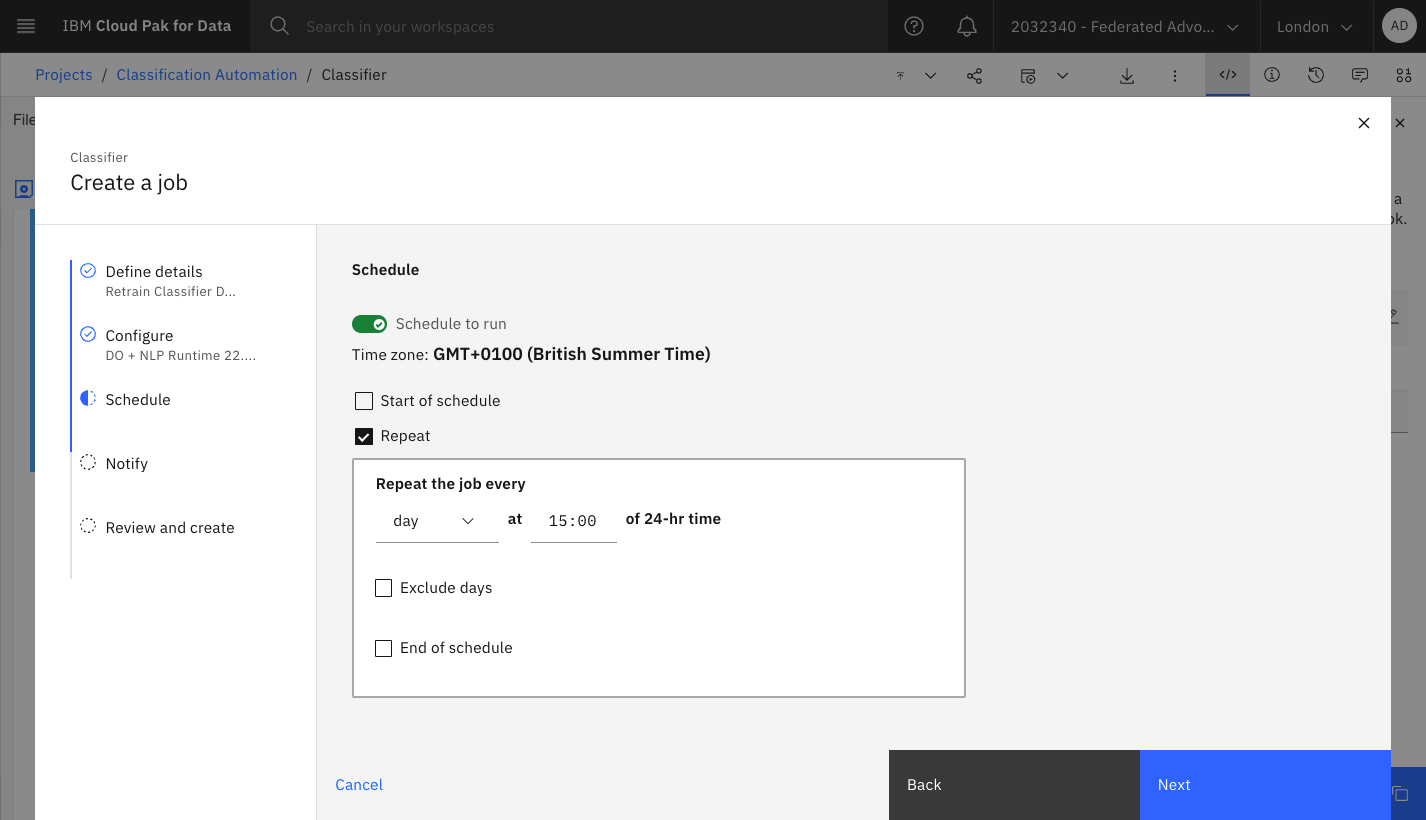
If you’re not familiar with these steps, refer to these screenshots:
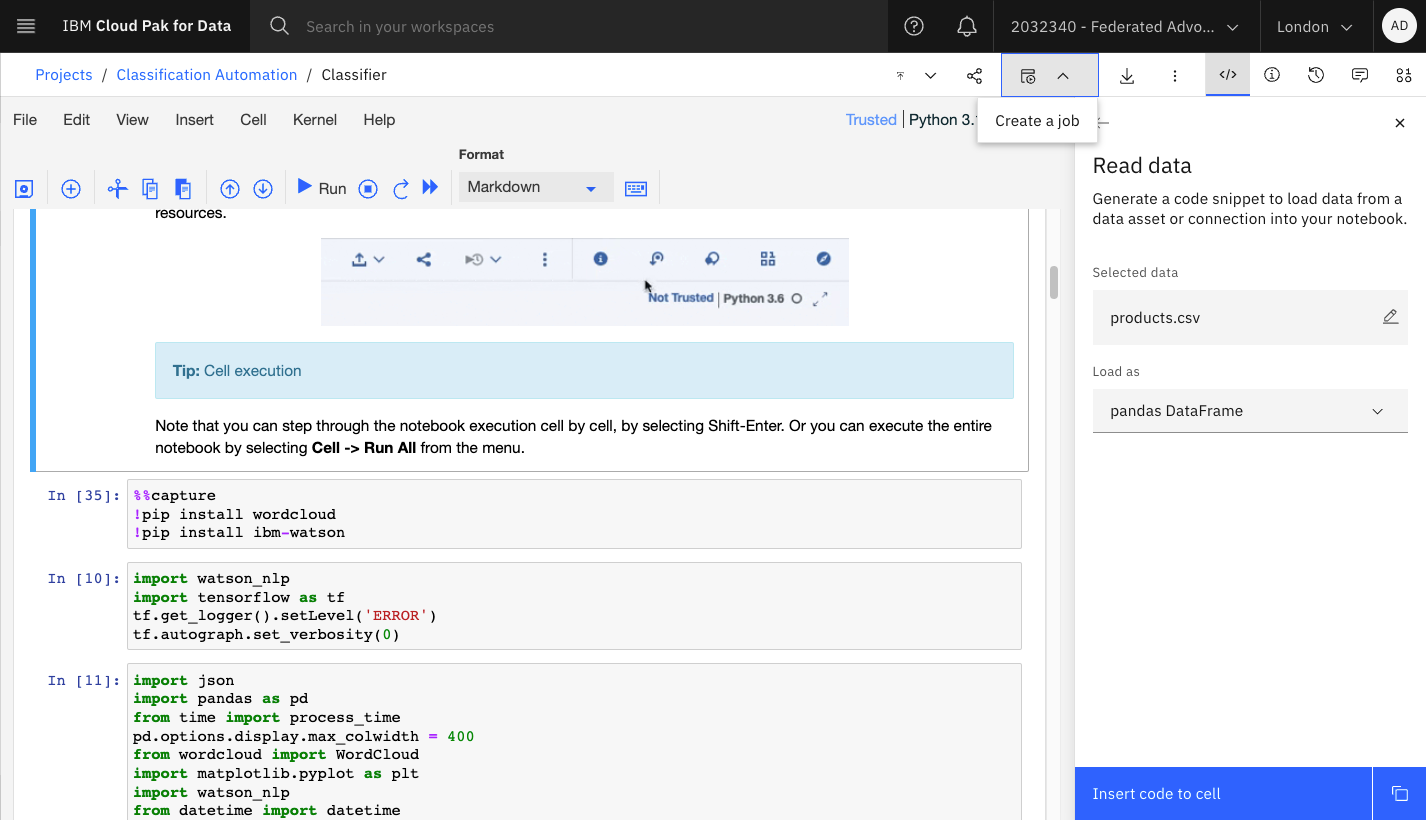
Open the notebook and use the Code Snippet icon to add the products.csv as a Pandas Dataframe to the cell containing the comment #Load csv file as DataFrame here.
Note it is possible to have the notebook use any COS bucket for reading the training data or writing the output, see this article for more information. However, I plan to keep it simple and use the default bucket set up by the Watson Studio project.
Create a Watson Studio Job to trigger the Notebook on a schedule
In the Watson Studio project, edit the Jupyter notebook and click File->Save Version. Next click the icon to create a Job:
Specify the version of the notebook and the runtime (which must include the Watson NLP libraries):
Set a schedule. We can also test the job by triggering it manually.
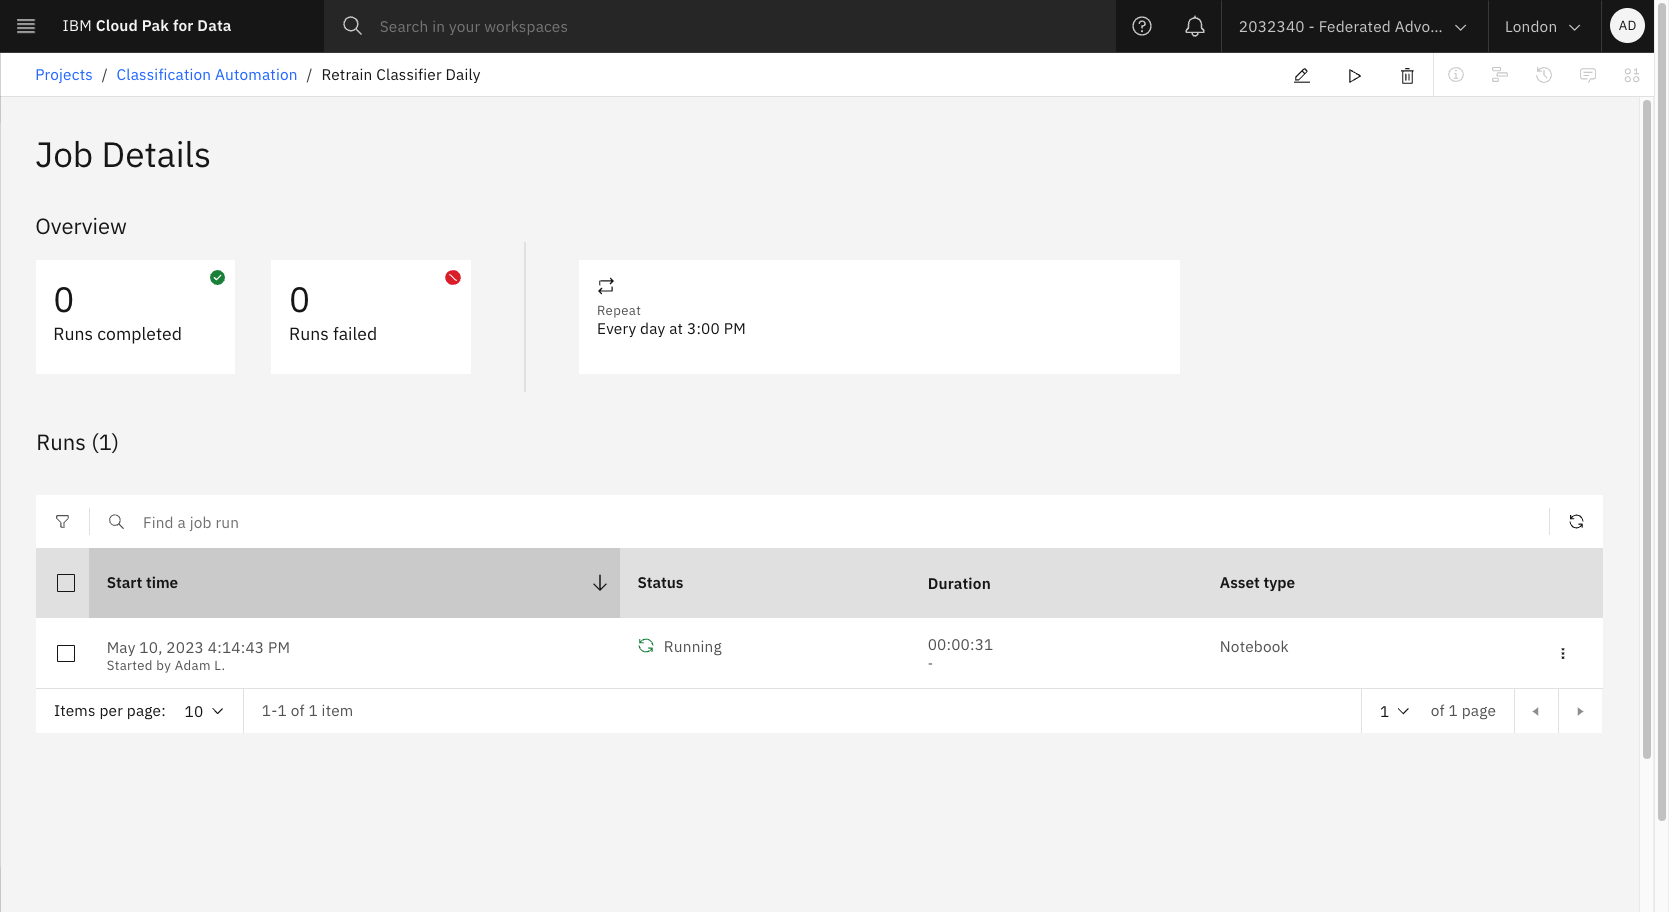
Review the summary, then create and run the job for the first time:
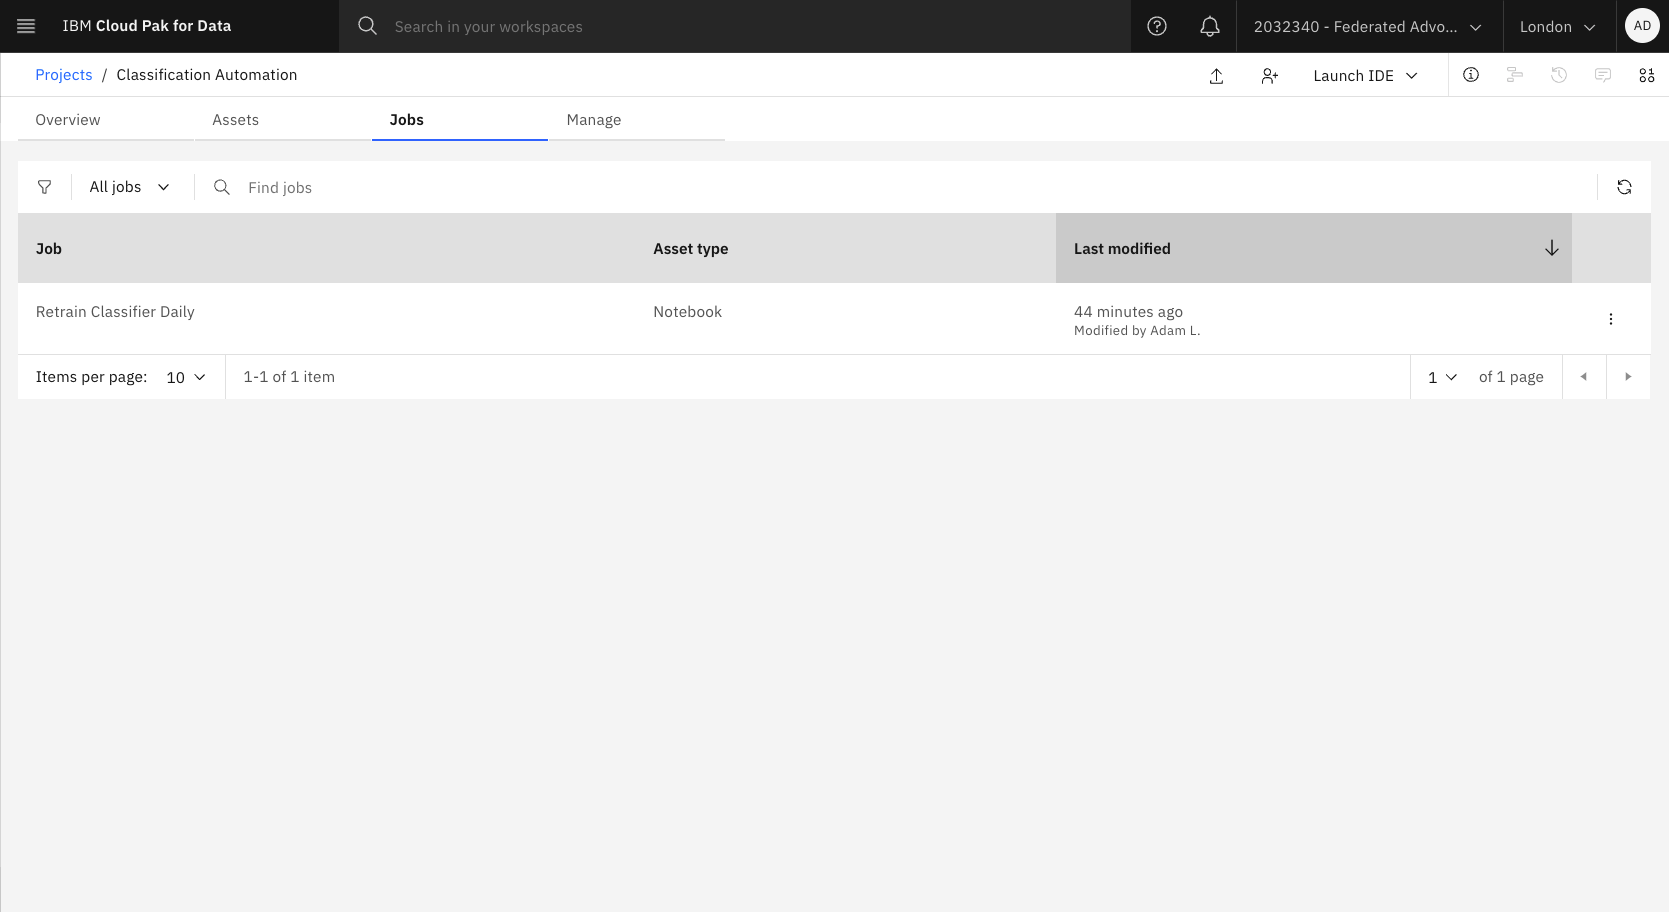
The Job can be reviewed here:
Install and configure KServe Modelmesh
I took the quickstart approach to install KServe Modelmesh on Kubernetes:
1
2
3
4
5
6
RELEASE=release-0.9
git clone -b $RELEASE --depth 1 --single-branch https://github.com/kserve/modelmesh-serving.git
cd modelmesh-serving
kubectl create namespace modelmesh-serving
kubectl config set-context --current --namespace=modelmesh-serving
./scripts/install.sh --namespace modelmesh-serving --quickstart
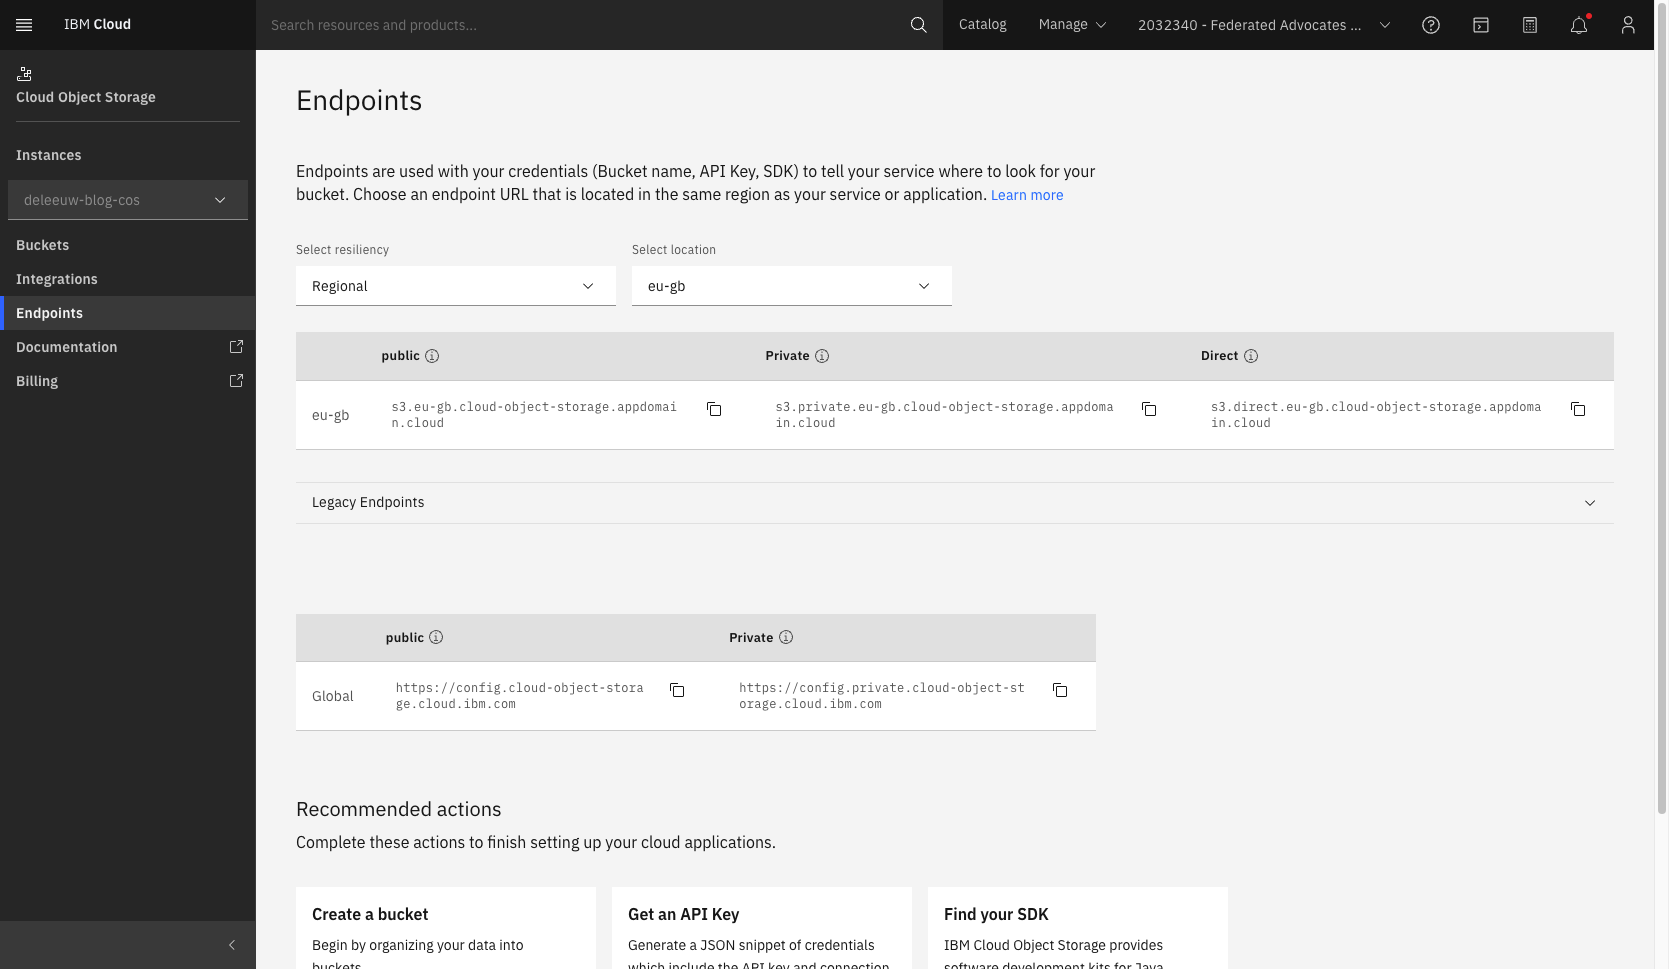
Patch the storage-config secret so it can reference the COS on IBM Cloud, in addition to the local minio object storage installed by the quickstart script. The required values can be found in IBM Cloud:
1
kubectl patch secret storage-config -n modelmesh-serving -p='{"stringData":{"ibmCOS":"{\n  \"type\": \"s3\",\n  \"access_key_id\": \"<YOUR ACCESS KEY>\",\n  \"secret_access_key\": \"<YOUR SECRET ACCESS KEY>\",\n  \"endpoint_url\": \"https://s3.eu-gb.cloud-object-storage.appdomain.cloud\",\n  \"default_bucket\": \"<YOUR BUCKET NAME>\",\n  \"region\": \"en-gb\"\n}\n"}}'
Follow the steps Create a Pull Secret and ServiceAccount from Deploying IBM Watson NLP to Kubernetes using KServe Modelmesh
Follow the steps Configure a ServingRuntime for Watson NLP from Deploying IBM Watson NLP to Kubernetes using KServe Modelmesh
Finally, an InferenceService CR needs to be created to make the model available via the watson-nlp Serving Runtime that we already created. This resource defines the location for model ensemble_model.zip in the COS bucket used by the Watson Studio project. Note, the notebook must save the model with a zip extension.
1
2
3
4
5
6
7
8
9
10
11
12
13
14
15
16
17
kubectl apply -f - <<EOF
apiVersion: serving.kserve.io/v1beta1
kind: InferenceService
metadata:
  name: food-classifier-ensemble-model
  namespace: modelmesh-serving
  annotations:
    serving.kserve.io/deploymentMode: ModelMesh
spec:
  predictor:
    model:
      modelFormat:
        name: watson-nlp
      storage:
        path: ensemble_model.zip
        key: ibmCOS
EOF
The status of the InferenceService can be verified:
1
2
3
4
kubectl get InferenceService

NAME              URL                                               READY   PREV   LATEST   PREVROLLEDOUTREVISION   LATESTREADYREVISION   AGE
food-classifier-ensemble-model   grpc://modelmesh-serving.modelmesh-serving:8033   True
Note, the watson-nlp-runtime container can take 5-10 minutes to download. Until this has completed, the InferenceService will show a status of False.
Test the model via KServe
The modelmesh-serving Service does not expose a REST port, only GRPC. Interacting with GRPC requires the proto files. They are published here. Enter the following commands to test the classification model using grpcurl:
1
kubectl port-forward service/modelmesh-serving 8033:8033
Open a second terminal and run commands:
1
2
3
4
5
6
7
8
9
10
11
12
git clone https://github.com/IBM/ibm-watson-embed-clients
cd ibm-watson-embed-clients/watson_nlp/protos
grpcurl -plaintext -proto ./common-service.proto \
-H 'mm-vmodel-id: food-classifier-ensemble-model' \
-d '
{
  "rawDocument": {
    "text": "Ice cream"
  }
}
' \
127.0.0.1:8033 watson.runtime.nlp.v1.NlpService.ClassificationPredict
The GRPC call is routed by the modelmesh-serving Service to the appropriate serving runtime pod for the model requested. Modelmesh ensures there are enough Serving Runtime pods to meet demand. The response from the watson-nlp-runtime should look like this:
1
2
3
4
5
6
7
8
9
10
11
12
13
14
15
16
{
  "classes": [
    {
      "className": "FrozenProduct",
      "confidence": 0.64872366
    },
    {
      "className": "FreshProduct",
      "confidence": 0.6426748
    }
  ],
  "producerId": {
    "name": "EWL classifier",
    "version": "0.0.1"
  }
}
Update the training data using minio
In a typical scenario, new training data may become available periodically. Update the data to include an additional category (Bakery) and training examples:
1
cp watson-embed-demos/nlp/classification/data/products-new.csv watson-embed-demos/nlp/classification/data/products.csv
Use mino, Cyberduck or similar tool to connect to COS:
1
2
kubectl get secret/storage-config -o json | jq -r '."data"."'ibmCOS'"' | base64 -d
mc config host add ibmCOS <COS_ENDPOINT> <ACCESS_KEY_ID> <SECRET_ACCESS_KEY>
Note, the service credentials must have Manager role.
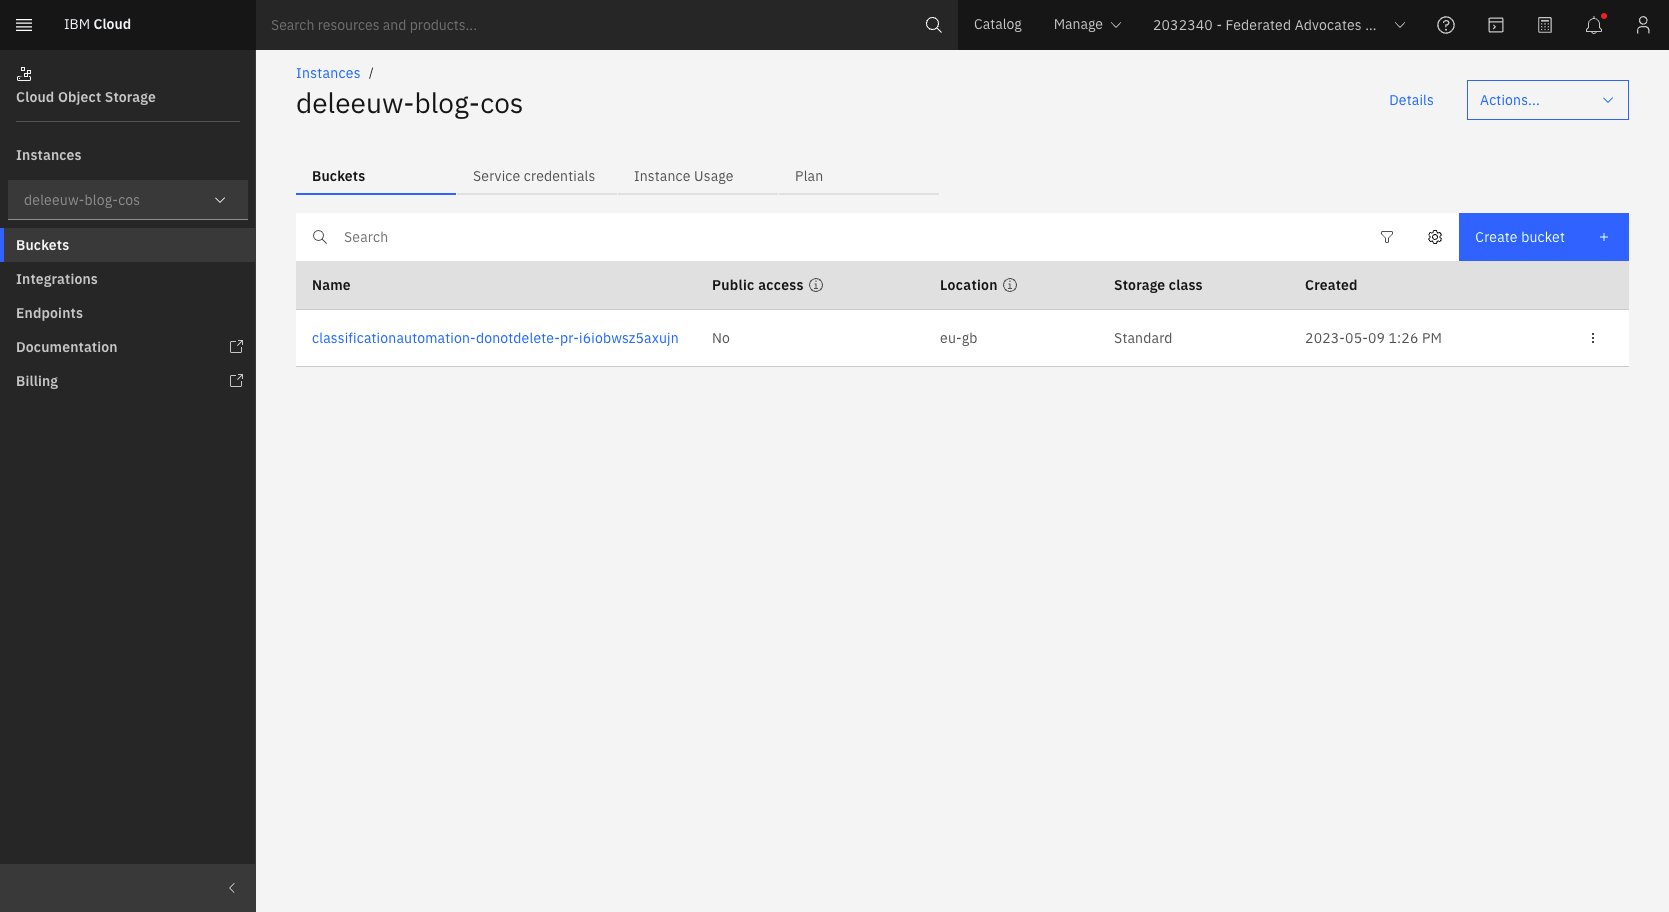
Upload the modified products.csv to the cloud object storage bucket used by Watson Studio:
1
2
3
export ALIAS=ibmCOS
export BUCKET=<your bucket, e.g. 'classificationautomation-donotdelete-pr-i6iobwsz5axujn'>
mc cp watson-embed-demos/nlp/classification/data/products.csv ${ALIAS}/${BUCKET}/products.csv
Wait for the Watson Studio Job to execute on its schedule, or trigger a new run now.
Test the updated model via KServe
1
2
3
4
5
6
7
8
9
10
11
cd ibm-watson-embed-clients/watson_nlp/protos
grpcurl -plaintext -proto ./common-service.proto \
-H 'mm-vmodel-id: food-classifier-ensemble-model' \
-d '
{
  "rawDocument": {
    "text": "Hovis white sliced bread"
  }
}
' \
127.0.0.1:8033 watson.runtime.nlp.v1.NlpService.ClassificationPredict
The response demonstrates how the automation has made available a revised classifier incorporating the new training data (i.e. the Bakery class).
1
2
3
4
5
6
7
8
9
10
11
12
13
14
15
16
17
18
19
20
{
  "classes": [
    {
      "className": "Bakery",
      "confidence": 0.66240567
    },
    {
      "className": "FrozenProduct",
      "confidence": 0.6344656
    },
    {
      "className": "FreshProduct",
      "confidence": 0.631302
    }
  ],
  "producerId": {
    "name": "EWL classifier",
    "version": "0.0.1"
  }
}


